Image Error Level Analysis: What It Really Tells You and What It Doesn't
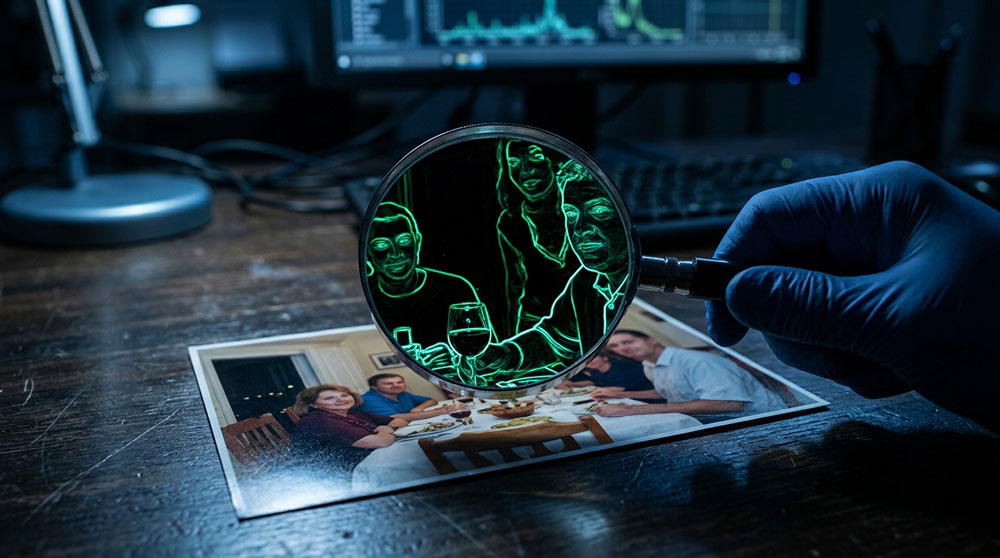
Run a suspicious photo through an Error Level Analysis tool and parts of it light up in bright, almost neon patches. It looks like the picture is confessing. Most people glance at those glowing areas, decide the image is fake, and move on, and they're usually wrong. Image Error Level Analysis, or ELA, is one of the most popular tools for spotting edited photos, and easily one of the most misread. This guide covers what it really shows, how to run it yourself, how to read the results without fooling yourself, and where it stops being useful.
What Image Error Level Analysis Actually Shows
Here's the short version, so you have the answer before the details. Error Level Analysis takes a JPEG, saves a fresh copy at a fixed quality setting, and compares the two. Everywhere the picture barely changes shows up dark, and everywhere it changes a lot shows up bright. That's it. The bright-and-dark map is just showing you which parts of the image are sitting at different compression levels.
Why does that matter? Because a photo that came straight out of a camera and was saved once should compress fairly evenly all over. If someone pasted a face from one image into another, or cloned out a watermark, that patched area often carries a different compression history. Under ELA, it can stand out from everything around it. So the tool isn't detecting edits directly; it's detecting differences in compression, and edits are one common reason those differences show up.
Why JPEG Compression Is the Whole Trick
None of this works without understanding one thing about JPEG: it throws data away on purpose. JPEG is a lossy format, which means every time you save a photo as a JPEG, it discards some detail to shrink the file. The algorithm chops the image into 8x8 pixel blocks and compresses each block on its own. Save once, and every block loses a little quality at roughly the same rate.
Now picture what happens when you edit. You open a JPEG, paste in a chunk from a different photo, and save the whole thing again. The original parts have now been compressed twice, while your pasted region has its own separate history. Those mismatched compression levels are exactly what ELA lifts to the surface. The technique was popularized by Neal Krawetz, the researcher behind FotoForensics, and the entire method rests on this quirk of how JPEG saves data.
This is also why ELA struggles with PNG and TIFF files. Those formats are lossless, so they don't leave the compression fingerprints ELA depends on. Feed a fresh PNG into an ELA tool and the whole thing tends to glow uniformly, which tells you almost nothing. ELA is a JPEG technique first, and that's worth keeping in mind before you read anything into the results.
How to Run an ELA Scan in About Two Minutes
You don't need special software to try this. The fastest route is FotoForensics. Upload an image or paste a URL, and it returns the ELA view next to the original, along with a stack of metadata. Forensically, a free browser-based toolkit built by Jonas Wagner, has an ELA slider plus a magnifier, clone detection, and noise analysis in one place. Both run entirely in your browser, and I reach for Forensically when I want to nudge the quality and amplification settings and watch how the result shifts.
If you'd rather do it by hand, ImageMagick makes it a three-step job. Resave the photo at a known quality, take the pixel difference against the original, then amplify it so your eyes can see it. Something like: convert original.jpg -quality 95 resaved.jpg, then compare the two with a difference composite, then brighten the output. Most tools resave somewhere between 75 and 95 percent quality, and changing that number changes what you see, which is a hint about how much judgment is baked into reading these images.
How to Read the Results Without Fooling Yourself
This is the part the tutorials rush through, and it's where most people go wrong. Start by ignoring the edges. High-contrast borders, sharp lines, and busy textures naturally light up under ELA because those areas hold the most detail and compress the hardest. A bright outline around a building or a person is normal. It is not a sign of tampering.
What you actually want to compare is like against like. Find the smooth, low-detail regions, like a clear sky, a painted wall, or a plain shirt, which should all read dark and even. If one patch of flat sky glows while the rest stays dark, that's the kind of inconsistency worth a second look. The trick I use is to mentally group the image into surfaces, edges, and textures, then ask whether similar things show similar error levels. A face that's noticeably brighter or duller than everything at the same depth in the photo is a flag, not a verdict.
The Mistake Almost Everyone Makes
The single most common error is treating "bright" as "fake." I've watched people run a normal, untouched photo through ELA, see the expected glow on edges and high-detail areas, and confidently announce it was doctored. There's a whole corner of the internet, flat-earth forums being the classic example, that uses ELA this way to "prove" ordinary photos are fabricated. The problem is that by their logic, every digital photo ever taken is fake, because every JPEG produces an uneven ELA map.
ELA doesn't tell you something was edited. It tells you where compression levels differ, and then it's on you to figure out why. A bright region might be an edit, but it might also be a high-contrast logo, a resized image, an added layer of noise, or simply a part of the photo with lots of fine detail. As the people who built these tools keep repeating, ELA points at suspicious areas; it does not hand you a conclusion. Treat a bright patch as a question, never as proof.
What ELA Cannot Catch (Including AI-Generated Images)
ELA has real blind spots, and knowing them keeps you honest. Resave a JPEG enough times, like when a meme bounces around social media, and the whole image settles to a uniform minimum error level. At that point edits and originals look the same, because the compression history has been flattened. Screenshots do something similar: they discard the original file and create a brand-new JPEG, wiping out the very fingerprints ELA needs. The same goes for anything Facebook, Instagram, or a messaging app has re-compressed on the way through.
The bigger limitation in 2026 is fully AI-generated images. A picture from Midjourney, DALL-E, or a Stable Diffusion model isn't a real photo with a fake region spliced in. It's a single synthetic image with one consistent compression history, so there's no mismatched patch for ELA to catch. The image can be entirely fabricated and still produce a clean, uniform ELA map. That's a crucial point, because the thing most people now want to detect, AI fakery, is often the thing ELA is worst at spotting.
That's why the field has moved toward other signals. Provenance standards like C2PA Content Credentials, which became an ISO standard and which most major generators now embed, can attach a signed record of how an image was made. Google's SynthID watermarks supported AI output. Frequency-domain methods analyze the noise patterns a real camera sensor leaves behind, which AI images tend to lack. None of these is perfect on its own, and all of them can be stripped or fooled, which leads straight to the real lesson.
Where ELA Fits in a Real Verification Workflow
Here's what I've seen work: never let one tool make the call. ELA is a single input, useful for flagging possible splices in a JPEG, and it gets far more reliable when you stack it against other checks. Start with the metadata. Does the EXIF data show a camera, a date, an editing program like Photoshop? Missing or contradictory metadata is its own clue.
Then widen out. Run a reverse image search to see whether the picture appeared earlier somewhere else, possibly in its original, unedited form. Check the lighting, the shadows, the reflections, and the proportions, because physics is harder to fake convincingly than pixels. Look for a C2PA credential if one exists, but remember that the real case comes from the combination of metadata, source history, a reverse search, and plain visual reasoning. A common mistake I notice is people stopping at the first tool that gives them the answer they were hoping for.
Wrapping Up: Your Next Step
Image Error Level Analysis is a sharp tool with a narrow job. It reveals where a JPEG's compression levels disagree, which can expose a splice or a paste that's invisible to the naked eye. What it doesn't do is announce that a photo is fake, and it's close to useless against fully AI-generated images and heavily re-saved files. Used with that understanding, it earns its place in your kit. Used as a one-click lie detector, it'll mislead you more often than it helps.
Your next step is simple: go practice on images where you already know the answer. Grab a photo straight from your camera roll and run it through FotoForensics so you can see what an untouched image looks like. Then make an obvious edit in any photo editor, paste in a shape or clone out an object, save it as a JPEG, and run it again. Once you've watched the difference with your own eyes a few times, you'll read ELA results with a lot more confidence, and a lot less of the false certainty that trips up everyone else.
Related articles
Content Credentials (C2PA): What the "CR" Pin on a Photo Actually Proves and What It Doesn't
You've probably started seeing a small "CR" icon on images, or labels saying a photo was made or edited with AI. That's Content Credentials (C2PA) at work, a cryptographic way of attaching a verifiable history to a file. This guide explains what that history actually proves, where it breaks, and how to check it yourself in about a minute.